![]()
There are many ways to backup your WordPress Blogs but so far I find this way as the safest way to get your files intact and the quickest way to restore them.
At the end of this tutorial, you will have four files essential in restoring your blog/s to your new server or for backup purposes. These four files are your SQL database in sql.gz format and WP plugins folder, WP themes folder and WP uploads folder all in zip formats.
To get these files, please carefully follow the instructions below:
1. Login to your CPANEL account.
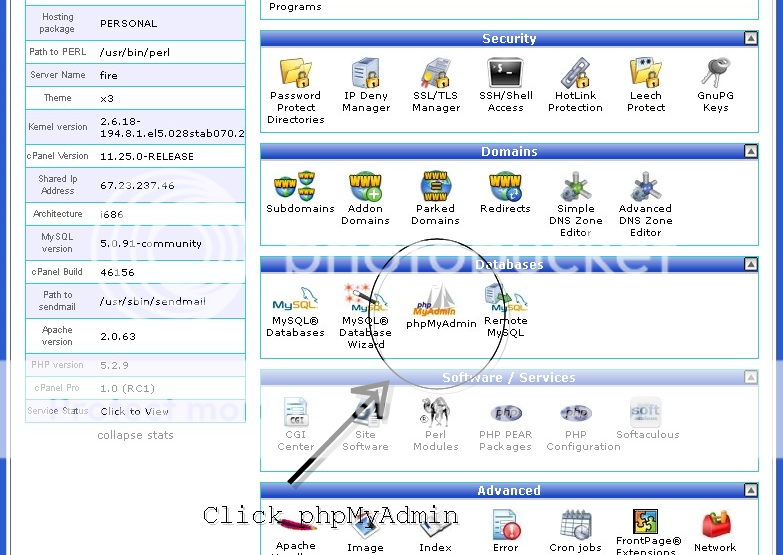
2. Look for Databases and under it, click on phpMyAdmin.
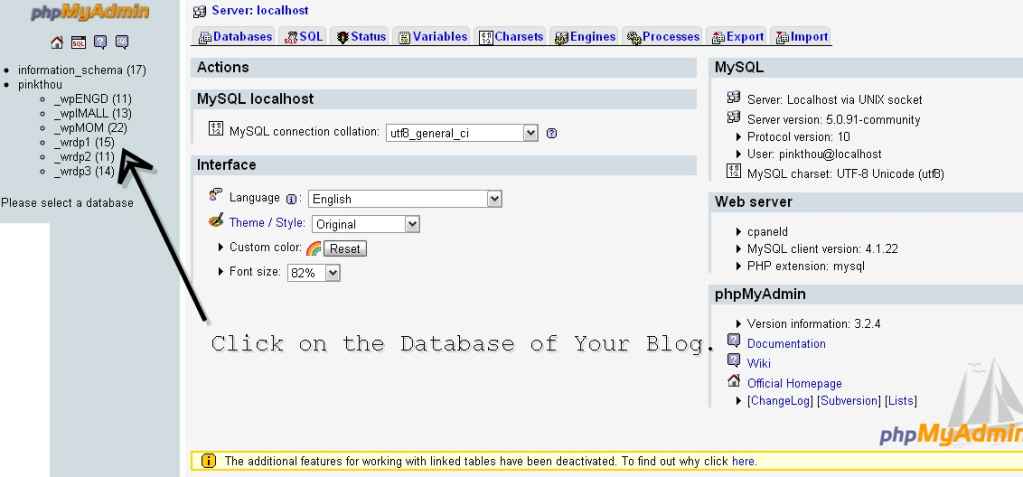
3. You will be redirected at phpMyAdmin. Be careful what you do here. One mistake might delete all your blog. So please be careful. Once your here, click on the name of your blog’s database. It is found on the left side.
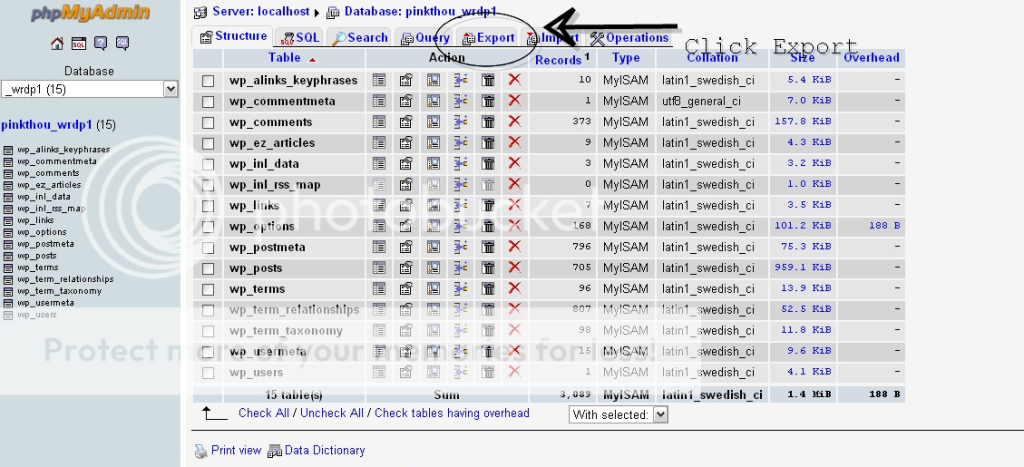
4. After clicking, you will be shown the tables of your blog’s database. Just click Export above.
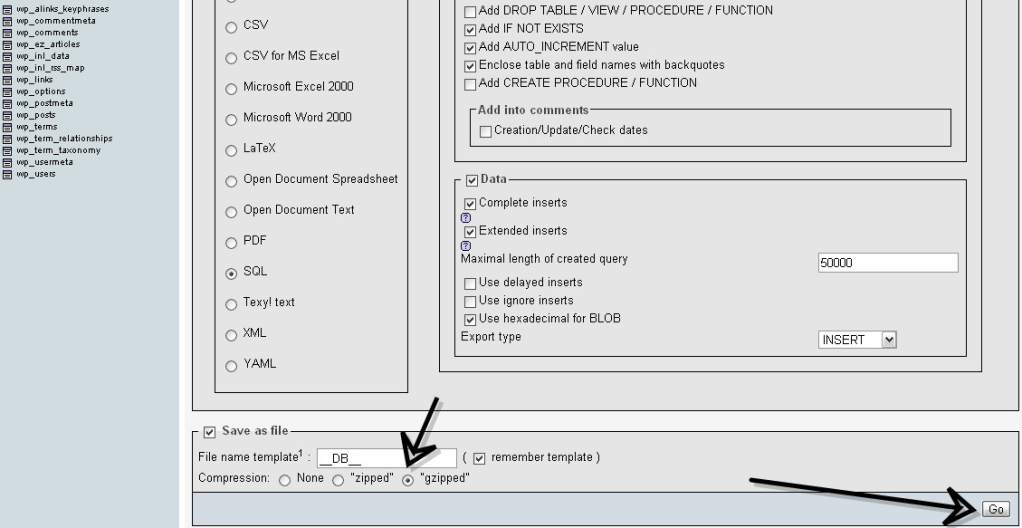
5. You will be then redirected to the export page. Go down and tick “gzipped” then click “Go.” After this your database’s table will be downloaded.
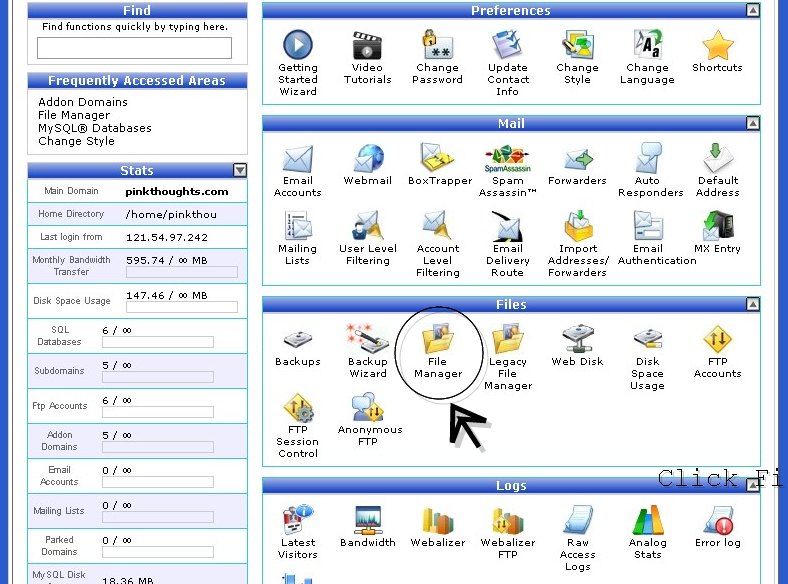
6. After downloading your first file, then go back to your CPANEL dashboard. Look for Files and under it click “File Manager.”
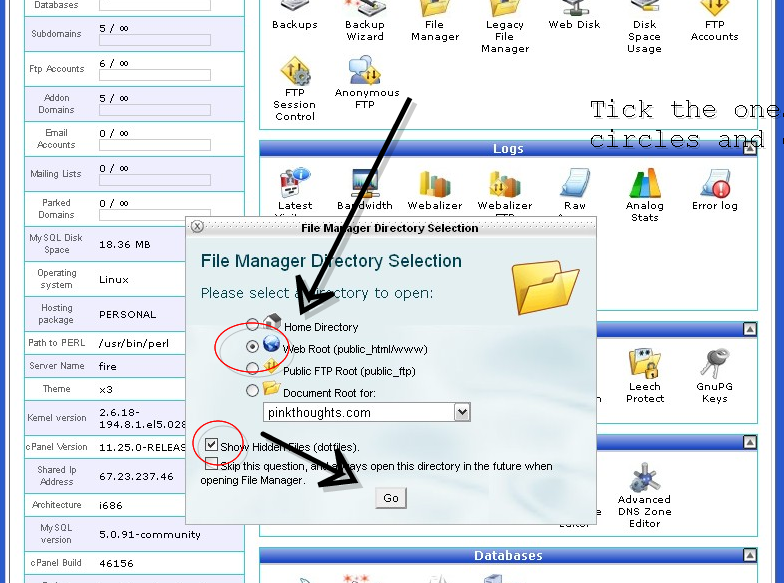
7. A popup window will appear, tick on Web Root and Show Hidden Files and then click Go.
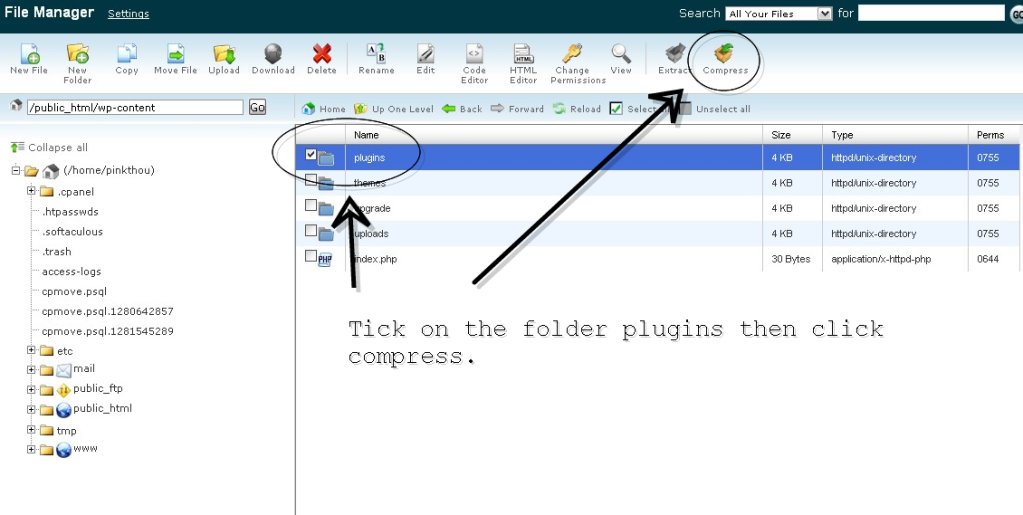
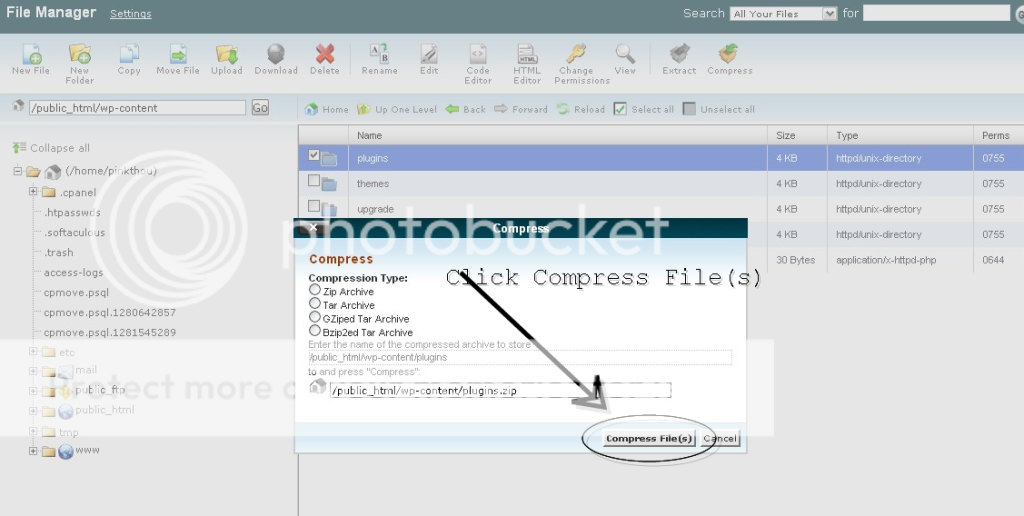
8. Once you a redirected to the File Manager of your CPANEL account. Look for the folder “wp-content” and click it.

9. Once inside, tick plugins and then click compress. A zip file of the folder will appear. Repeat the process for the themes and uploads folder.
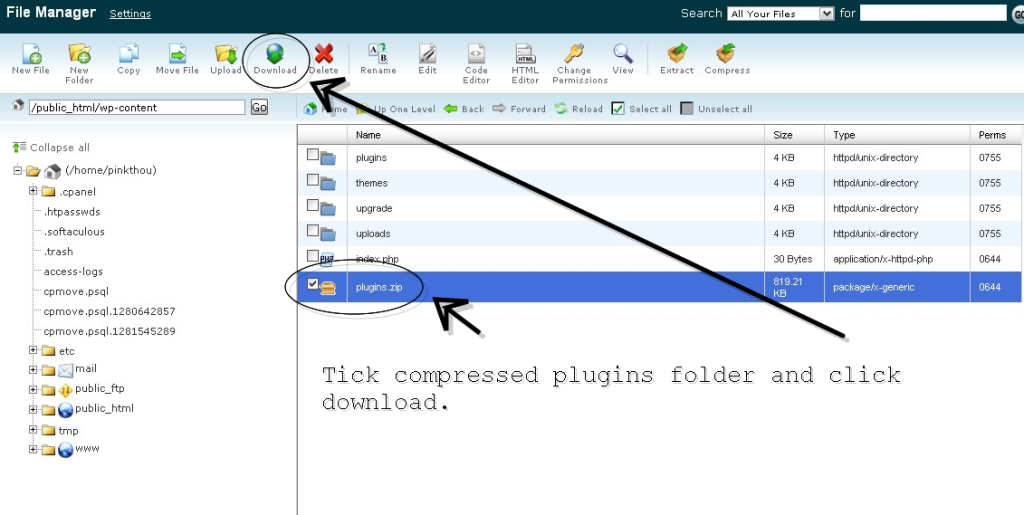
10. After all the folders have been zipped, tick on the zip file and download the file to your computer.
Now, you all have the four essential files of your blog’s backup. If you noticed this is manual and I like it that way because so far, based on my experience, some auto backup and plugins creates corrupted backup files. So I preferred to be safe than sorry.
So, just in case your blog will go down and your data went kaput, then you will not panic because you will always have a blog backup that you can always upload anytime! Hope this small tutorial helps!
adto nlang kos tools momi kay lisod if naa masayop ug click sa phpmyadmin. 🙂 magbackup nako permi kay ang godaddy domains na gihost nako nahanaw ug kalit. so far kato ra pud silang duha kablogs nawala intawon. sa akong domains na registered sa laing domain registrar fine ra man pud. so backup lang ko anytime using export tools para mas safer siguro :D. then gipangsave nako tanan sa akong computer ug sa portable hard drive just in case :). tho d ko sure giunsa to ug hack or if gihack ba kaha to.
wow. this is a great tutorial on how to back up blogs sa cpanel. i am going to bookmark this one. thanks for sharing.
waaaahh.. libug gihapon.. although easy to follow afraid me.. I might delete my blog… hahha.. never mind nalang..lol..
Thanks so much for this tutorial! 🙂 Now I can manually back up all my blogs too! 🙂
oh my gulay! there is so much to do! and i am afraid!
@weighty matters, don’t be afraid just follow the instructions carefully and you will be fine.
thanks for the tutorial pinay mommy, i followed it and it works fine.
very helpful..i just made a back up of my blogs.. 😐
Thanks for this tutorial marz. will bookmarked this one
yes backing up websites is easy but like others if your site is hosted on godaddy you find it hard to backup your site up because godaddy is not using cpanel like others do. i have this experience since 1 of my site is hosted on godaddy.
thanks for sharing mommy, but siguro I’ll stick sa kadtong isa ka back up 😀 basin ug masayop ko s acpanel impas tanan ahahaha