![]()
Most of us wanted to use GMAIL as our email account because it’s easy to use, can be easily connected with any email clients like Outlook, Incredimail and Mozilla Thunderbird, and of course it has a big diskspace on the most reliable server by Google.
Now, did you know that you could use a GMAIL email account for your existing site that is self-hosted? Yes, you can! You will not get the generic “you@gmail.com,” but an email like “you@yourdomain.com” and this can be done through Google Apps. This can also be applied with domains you purchased from other domain registrar that you used to connect to your blogspot blog.
So, how do you do about it? Simple, just follow this simple tutorial found after the jump on how to get a FREE Google Apps Email with your existing site!
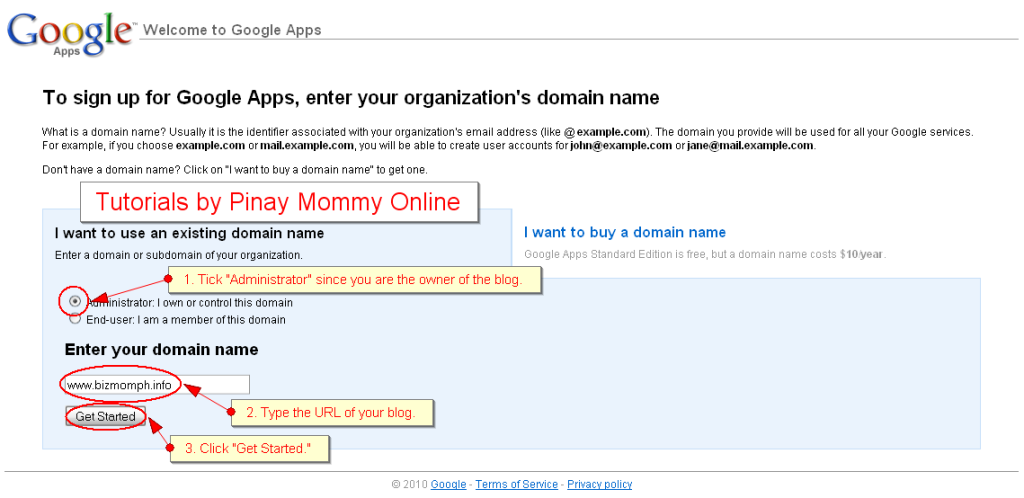
A. Login to to sign up for Google Apps using Standard Edition. We will use the Standard Edition because it’s FREE!
1. Tick “Administrator” since you are the owner of the site.
2. Type the URL of your blog or website.
3. Click “Get Started.”
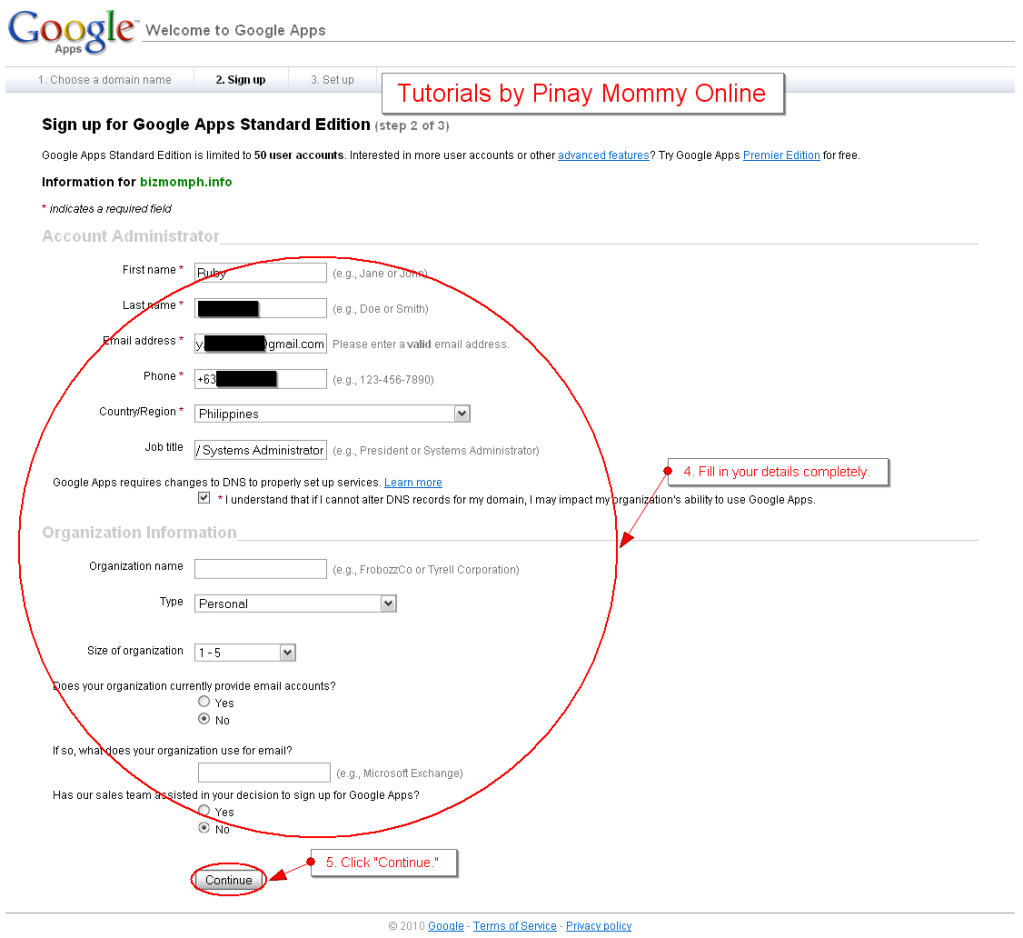
B. In the next page, you will be asked to fill in some personal details.
4. Fill in your details completely.
5. Click “Continue.”
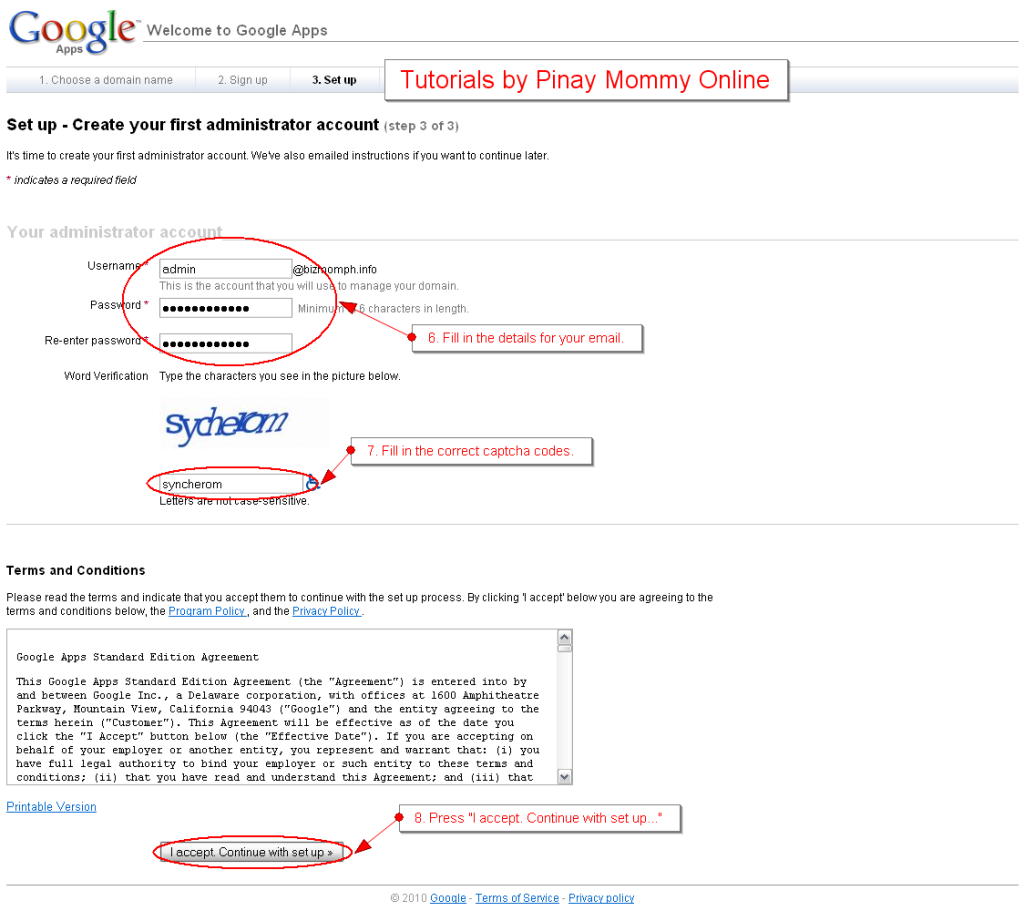
C. After clicking continue, you will be asked for your desired email account details.
6. Fill in the details for your desired email address for your site.
7. Fill in the correct captcha codes.
8. Press “I accept. Continue with set up…”
D. By this time, you will get an email from Google Apps about your email account setup.
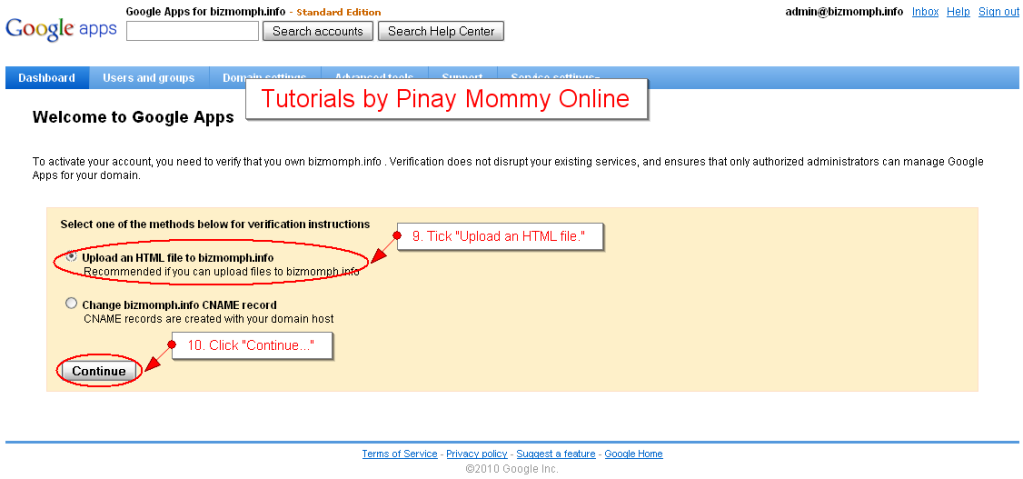
E. On the next page, you will be asked by Google Apps to confirm ownership of the domain. In my case, I am using my self-hosted wordpress blog www.bizmomph.info. Therefore, I have chosen to upload a file to my root directory. If you used your domain at your blogspot blog, you need to create a CNAME. This will be discussed in my next posts in the future.
9. Tick “Upload HTML File.”
10. Click “Continue.”
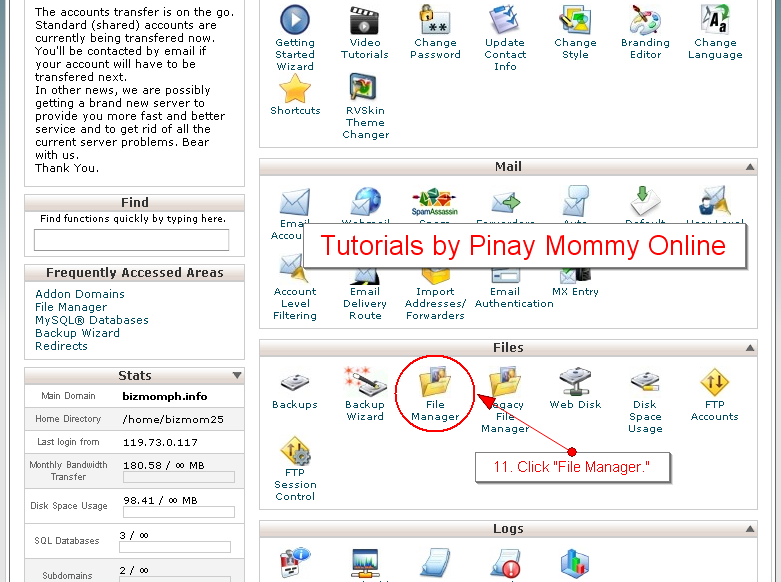
F. Before you continue, open a new tab on your browser and login to the CPANEL of your self-hosted domain. Once you’re inside, look for Files. Under it…
11. Click “File Manager.”
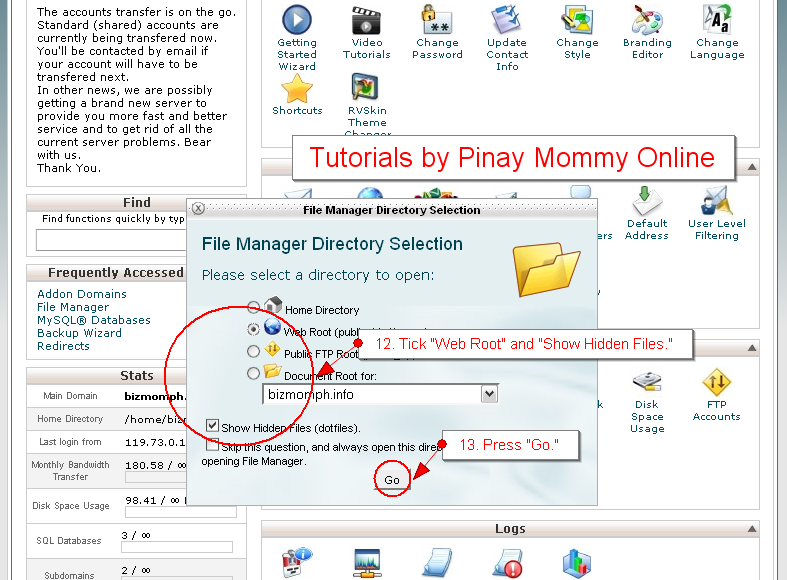
G. Then you will see a prompt on File Manager Directory Selection.
12. Tick “Web Root” and “Show Hidden Files.”
13. Press “Go.”
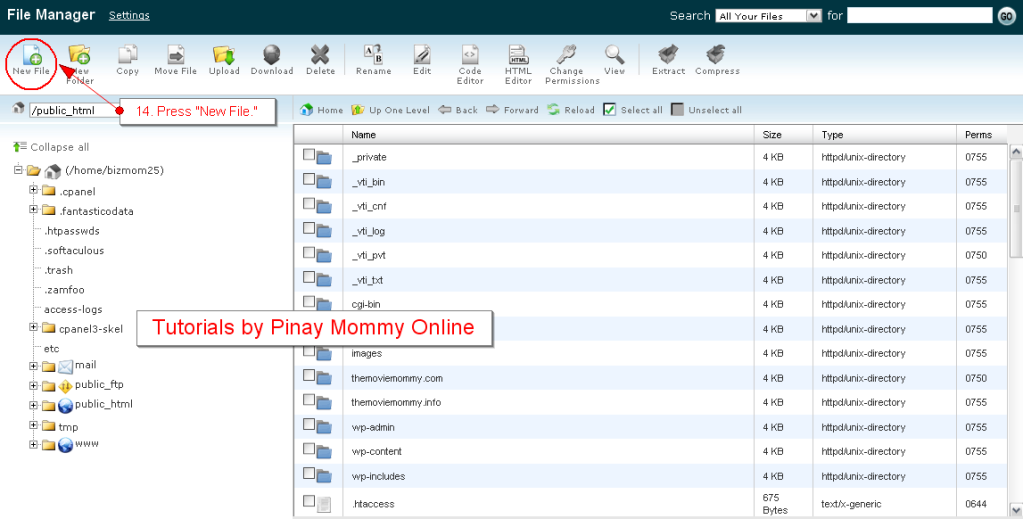
H. Once you are directed to your File Manager, you will now create an HTML file for your ownership verification for Google Apps.
14. Press “New File.”
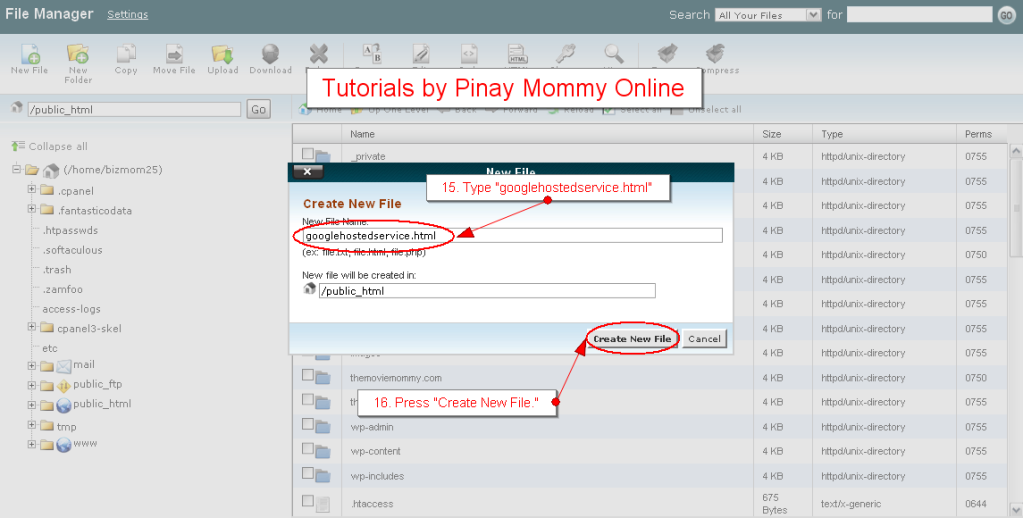
I. You will be prompted with a window to create a new file.
15. Type “googlehostedservice.html”
16. Press “Create New File.”
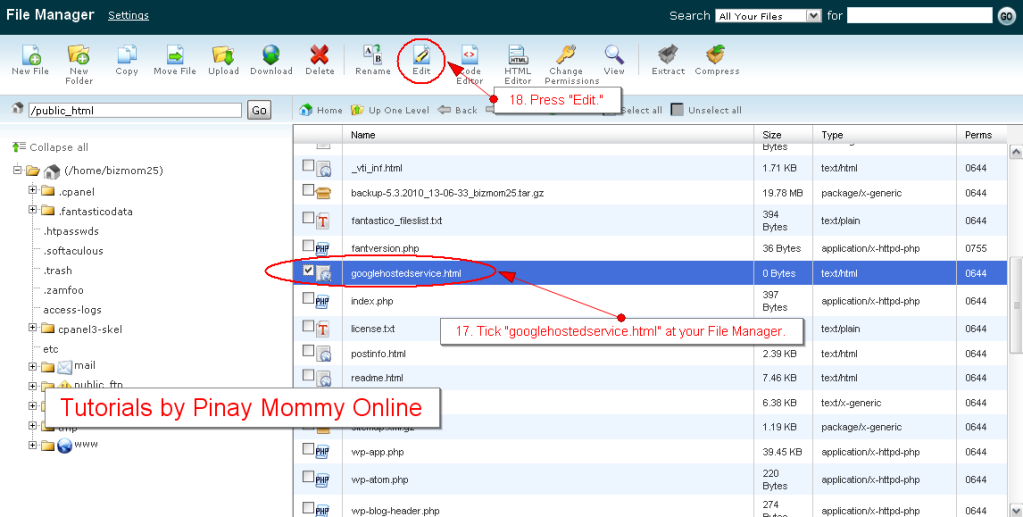
J. Once the HTML file is created, look for it at your File Manager. Then…
17. Tick “googlehostedservice.html” at your File Manager.
18. Press “Edit.”
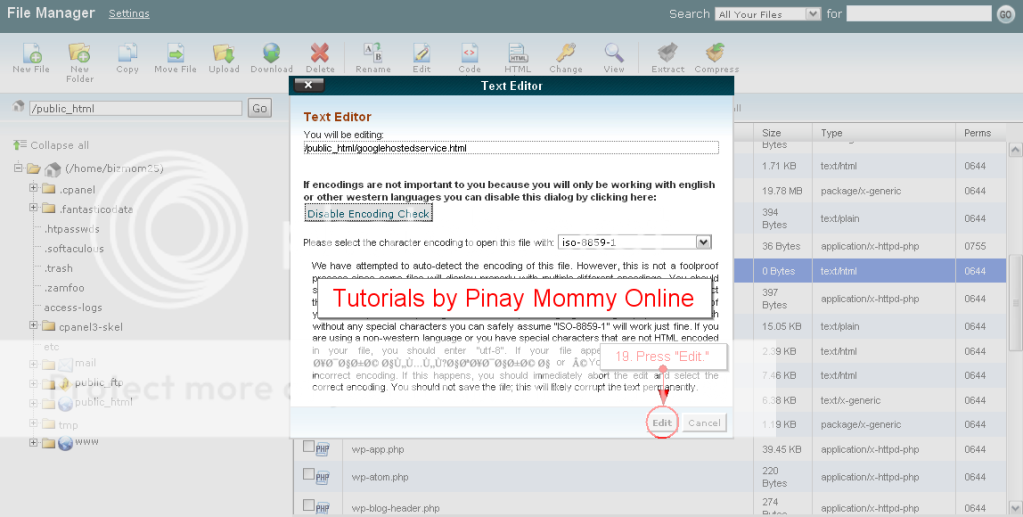
K. You will be prompted with another window.
19. Press “Edit.”
L. Another window will open…
20. Type the code given to your by Google Apps.
21. Click “Save Changes.”

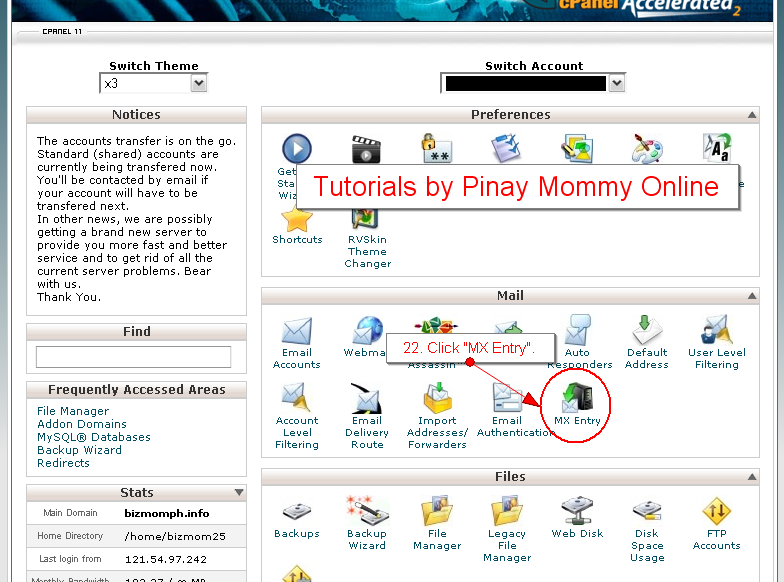
M. Go back to your CPANEL dashboard and look for MX Entry under Mail.
22. Click MX Entry.
N. You will be directed to another page asking you to ADD MX Records.
23. Add MX Records accordingly.
| Priority | Destination |
| 10 | ASPMX.L.GOOGLE.COM |
| 20 | ALT1.ASPMX.L.GOOGLE.COM |
| 20 | ALT2.ASPMX.L.GOOGLE.COM |
| 30 | ASPMX2.GOOGLEMAIL.COM |
| 30 | ASPMX3.GOOGLEMAIL.COM |

O. Sign out from your site’s CPANEL and go back to the window where you created your Google Apps email account.
24. Press “I’ve completed the steps above.

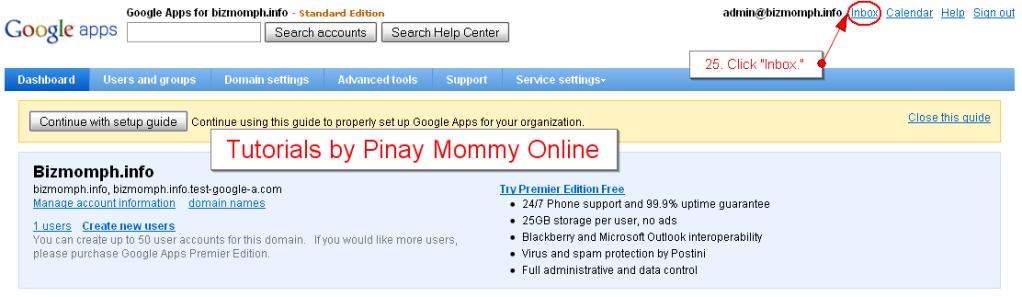
P. You will be led to a page with a setup guide. You can read or skip it. As for me, I skipped it to the next page. On the next page…
25. Click “Inbox” in the upper right corner of the window.
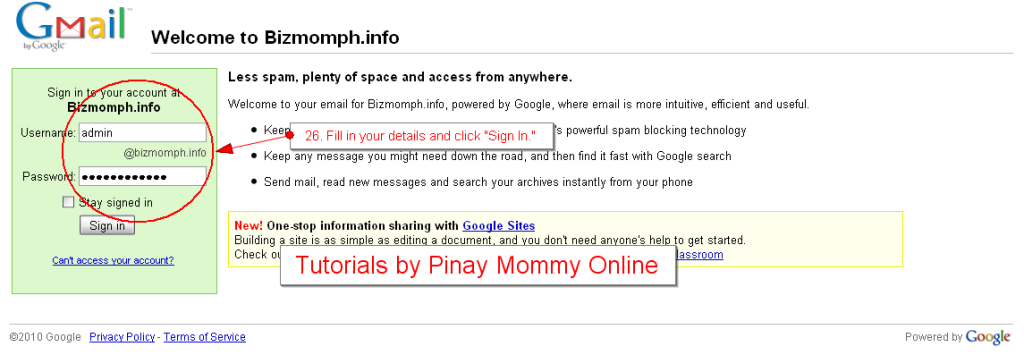
Q. You will then see the login page of your email.
26. Fill in your details and click “Sign In.”
Congratulations! You now have a FREE email using Google Apps!! You can connect it with any of your email clients just like the way you connect to your GMAIL email account!!
By the way, you can access your email account by logging in to:
http://www.google.com/a/yourdomain.com
Just change yourdomain.com with your domain name.
See how simple setting up an email could be? I am sure you didn’t need an acne treatment with the setup. Following the tutorial step by step makes it stress free. So no stress means no acne!
If you have questions, fill free to leave a comment below. And if you find this post helpful, please bookmark it or share it to your friends using any of the social bookmarking sites below. Thank you very much!
We use this at work too! Thanks for sharing!
wow! galing mo naman. I do have my gmail account pero hindi ko sya masyado feel gamitin!
Very smart tutorial post mommy marz. I have gmail too but I don’t use it too often and ill stik to yahoo and what i know para di makutaw ako utok hehehe. This info will be usefull to lots of gmail users. Thanks for sharing.
Blog Idol just got started earlier today, you can cast your vote now, at http://bluedreamer27.blogspot.com
Thanks a lot for participating!
Great post mommy Rubz! Will definitely try this one later!
Wow galing ni mommy oy grabe ako ra ni sundan ug di na mabusy ako life. Mommy send na diay nako ang prize ug gift for Bella last week…Hope you like it.
Oh cool! Will try this one too! Thanks for sharing Rubz!
I think this is a very good tutorial, many people would really appreciate it.
Thoughts of a Career Woman
Thanks sa info poh.. siguro eto rin ang ginagamit nyo ngayon sa blog ninyo noh?
I just used a email redirection for my new email me[@]blog-phdotcom and just redirect it to my current gmail, is that the same procedure?
yours was so long kase eh, pero it work nmn for me. my question is: is that reliable? would i always get the emails from that? please help :star:
@JayL:
No, it is not of the same procedure. Redirection is different from configuring your email account. You really use the email with “you@yourdomain.com” using a gmail platform. 😀
It’s long because I wanted to make it clear and understandable even to non techie people.
Yes, it is reliable. :yes:
thanks for the detailed tutorials Ruby.
Perfect… great tutorial dear.. made mine Too..
thanks mommy rubz! naayos ko na siya. see what emai i’m using now? mas mabilis pala maprocess kapag direct sa host.